Author's course on 3D visualization
Smart Render pro
from Anna Kireeva
/We will put into practice a step-by-step algorithm for creating a photorealistic render

/We will create an impressive portfolio in corona render

/Advanced modeling and materials will no longer seem like a nightmare to you

/We will teach you to work faster without losing quality

Author's course on 3D visualization
Smart Render pro
from Anna Kireeva
DURATION: 3 month
/Advanced modeling and materials will
no longer seem like a nightmare to you

/We will put into practice a step-by-step algorithm for creating a photorealistic render


/We will create an impressive portfolio in corona render
/We will teach you to work faster without losing quality

#goals
Smart render pro
FOR THOSE WHO WANT:
you will stop wasting time on unnecessary actions or you will be able to perform them in a couple of clicks

/TO LEARN HOW TO ORGANIZE AND OPTIMIZE THE WORK PROCESS
after the course, you will be able to model 90% of the furniture needed for projects or easily modify your existing models
/NOT TO DEPEND ON THE AVAILABILITY OF MODELS ON 3D DRAINS

you will stop holding on to bad customers with a low price tag, you will understand how to build a system so as to work only with those orders that you like
/TO ENTER THE TOP SEGMENT

you get clear tools, thanks to which you do not waste time studying on extended programs at other schools or studying on your own
/TO LEARN SKILLS IN PRACTICE

your portfolio will no longer consist of renderers with an ordinary design. You will be able to create projects in your portfolio that will attract customers of a new level
/TO PRESENT THEIR PROJECT TO CUSTOMERS IMPRESSIVELY AND INCREASE THE COST OF THEIR SERVICES


/BECOME A PRO LEVEL VISUALIZER
You will stop looking for a problem only in lighting or materials, but study and implement a complete formula for creating a photorealistic picture
#for_whom
ONLINE COURSE
is suitable for you if:
THE ONLINE COURSE
is suitable for you if
with little experience in 3dsmax
/YOU ARE A BEGINNER
with experience, but want to improve your skills
/YOU ARE A VISUALIZER
and want to implement your ideas yourself using rendering
/YOU ARE A DESIGNER
WHY DO SPECIALISTS
CHOOSE MY COURSE?
#why_us
/Smart FAQ
Quick solution of 39 problems and errors in working with 3dsmax
lessons can be saved to your computer and used after the course
/POWERFUL KNOWLEDGE BASE
You are not tied to the program and can complete the training quickly or as it is convenient for you
/learning at your own pace
at the end of the course, you will have a portfolio with a spectacular design. Two rooms: with natural light and artificial
/READY-MADE SPECTACULAR PORTFOLIO
you will understand what to do to work in the premium segment and to have your work reposted all over the Internet and attract new customers to you
/EMPHASIS ON DESIGN
/ADVANCED MODELING AND MATERIALS
highly polygonal modeling and the creation of advanced materials are explained in a structured and understandable manner during the training
/THE CAPACIOUS PROGRAM "WITHOUT WATER"
40 video lessons we create a project step by step from the 3dsmax setup to the last button in the render, using every secret of photorealism
/THE BEST PRICE-QUALITY RATIO
the skills acquired after completing the course will pay off after the first project. You will be able to make your projects faster, more realistic and more expensive
#your_portfolio
THIS IS HOW YOUR
PORTFOLIO WILL
DURING THE COURSE, YOU WILL MASTER EVERYTHING YOU NEED TO DO VISUALIZATION AT A PROFESSIONAL LEVEL
LOOK LIKE
#program
COURSE PROGRAM
MODULE 1
"START OF WORK. FUNDAMENTALS OF MODELING"
"START OF WORK. FUNDAMENTALS OF MODELING"

More detailed
1 LESSON
"Basic 3ds MAX setup. Scripts and plugins. Analysis of the
Technical task"
LESSON 2
"Principles of spectacular rendering"
LESSON 3
"3D modeling without subdivision surface (sds)"
LESSON 4
"Modifiers, ribbon panel. Reset xform tool"
LESSON 5
"Subdivision Surface (sds). Advanced modeling, theory"
LESSON 6
"Subdivision Surface (sds). Advanced modeling, practice"
Set up programs for effective work, learn the formula of high-quality rendering, fix simple modeling tools in practice and learn how to model complex objects using sds.
You will model: tables, a soft banquette, a soft rounded wall panel, a soft pouf, armchairs, vases.
Materials for the lesson: time code for the entire course, a list of hotkeys
Duration of lessons: 1 hour 54 minutes
You will model: tables, a soft banquette, a soft rounded wall panel, a soft pouf, armchairs, vases.
Materials for the lesson: time code for the entire course, a list of hotkeys
Duration of lessons: 1 hour 54 minutes
RESULT
MODULE 2
"CREATING PROJECT GEOMETRY"
"CREATING PROJECT GEOMETRY"

More detailed
LESSON 7
"Creating the volume of the room"
LESSON 8
"Creating floor coverings and interior box details"
LESSON 9
"Filling openings, modeling doors and door handles"
LESSON 10
"Modeling furniture from a project without SDS"
LESSON 11
"Modeling furniture from a project with SDS"
LESSON 12
"Plumbing modeling"
LESSON 13
"Modeling of a pendant lamp, creating backlights and ceiling spots"
LESSON 14
"Carpet modeling and decor arrangement"
LESSON 15
"Arranging other models, pulling up texture paths, cleaning the scene from garbage"
You will assemble the interior efficiently and from scratch: you will model walls, finishes, doors, furniture (cabinet, island, dining table, kitchen, coffee tables, shelves, sofa, armchair, chairs), plumbing (toilet bowl, sinks, fabric dryers), pendant lamp, carpet; arrange ready-made pro models
Materials for the lesson: models of windows, blinds, spots, fireplace, pillows, decor, flowers, hob, oven, microwave, coffee machine, hygienic shower, faucets, flush buttons, TV, sockets and switches
Duration of lessons: 3 hours 9 minutes
Materials for the lesson: models of windows, blinds, spots, fireplace, pillows, decor, flowers, hob, oven, microwave, coffee machine, hygienic shower, faucets, flush buttons, TV, sockets and switches
Duration of lessons: 3 hours 9 minutes
RESULT
MODULE 3
"PLACEMENT OF CAMERAS. THEORY"
"PLACEMENT OF CAMERAS. THEORY"

More detailed
LESSON 16
"Composition. Setting the camera frame"
LESSON 17
"Setting up and setting up cameras. Theory"
"Composition. Setting the camera frame"
LESSON 17
"Setting up and setting up cameras. Theory"
Learn the basic techniques of composition in setting the camera frame, study the settings of corona camera, learn how to set the camera frame quickly and conveniently
Duration of lessons: 34 minutes
Duration of lessons: 34 minutes
RESULT
MODULE 4
"PLACEMENT OF CAMERAS. PRACTICE"
"PLACEMENT OF CAMERAS. PRACTICE"

More detailed
LESSON 18
"Setting general camera frames. Practice"
LESSON 19
"Setting artistic camera frames. Practice"
"Setting general camera frames. Practice"
LESSON 19
"Setting artistic camera frames. Practice"
Put 53 spectacular camera frames (general and artistic). You will work out the skill of setting cameras.
Materials for the lesson: model of coffee tables
Duration of lessons: 28 minutes
Materials for the lesson: model of coffee tables
Duration of lessons: 28 minutes
RESULT
MODULE 5
"LIGHTING. THEORY"
"LIGHTING. THEORY"

More detailed
LESSON 20
"Lighting in interiors. Analysis by examples and recommendations"
21 LESSON
"Setting up lighting in 3ds max and corona render"
"Lighting in interiors. Analysis by examples and recommendations"
21 LESSON
"Setting up lighting in 3ds max and corona render"
You will find out which lighting is the most profitable and why, study the five basic principles of spectacular lighting and four ways of setting the light on the example of two different rooms (corona light, hdri map, corona sky, corona sun + sky), you will understand which way is better to choose in which situation.
Materials for the lesson: a set of files "ies"
Duration of lessons: 39 minutes
Materials for the lesson: a set of files "ies"
Duration of lessons: 39 minutes
RESULT
MODULE 6
"LIGHTING. PRACTICE"
"LIGHTING. PRACTICE"

More detailed
LESSON 22
"Setting up natural light in the course scene.
Bokeh effect"
LESSON 23
"Setting up artificial light in the course scene"
"Setting up natural light in the course scene.
Bokeh effect"
LESSON 23
"Setting up artificial light in the course scene"
Set up natural light from scratch using the sky + sun method, learn how to set up spectacular blurring of the background and foreground, set up artificial lighting in the hallway and bathroom
Materials for the lesson: aperture map
Duration of lessons: 31 minutes
Materials for the lesson: aperture map
Duration of lessons: 31 minutes
RESULT
MODULE 7
"MATERIALS. THEORY"
"MATERIALS. THEORY"

More detailed
LESSON 24
"Creating advanced materials. Theory"
LESSON 25
"UV mapping"
LESSON 26
"Creating a background"
"Creating advanced materials. Theory"
LESSON 25
"UV mapping"
LESSON 26
"Creating a background"
You will understand the principle of creating complex materials and UV mapping, learn how to create such materials: brushed metal, phys. correct glass, colored glass, gemstone, logo/drawing on something, plaster, concrete, detailed fabric (velour, plain fabric, tulle), gradient glasses and metals, water drops.
Materials for the lesson: a set of dirt cards, textures of three types of fabric, drops
Duration of lessons: 1 hour 35 minutes
Materials for the lesson: a set of dirt cards, textures of three types of fabric, drops
Duration of lessons: 1 hour 35 minutes
RESULT
MODULE 8
"MATERIALS. PRACTICE"
"MATERIALS. PRACTICE"

More detailed
LESSON 27
"Creating materials and texturing the room"
LESSON 28
"Creating materials and texturing all other objects in the scene"
LESSON 29
"Creating a background for a scene from the course"
"Creating materials and texturing the room"
LESSON 28
"Creating materials and texturing all other objects in the scene"
LESSON 29
"Creating a background for a scene from the course"
Create from scratch all the materials in the project (relief paint, veneer, herringbone parquet, tile, concrete, tinted glass, velour, carpet and background material), make UV mapping for all the objects modeled by us.
Materials for the lesson: textures of two types of concrete, parquet, tiles, veneer, relief paint, an image of a universal (often used) background
Duration of lessons: 1 hour 18 minutes
Materials for the lesson: textures of two types of concrete, parquet, tiles, veneer, relief paint, an image of a universal (often used) background
Duration of lessons: 1 hour 18 minutes
RESULT
MODULE 9
"FINAL RENDER"
"FINAL RENDER"

More detailed
LESSON 30
"Final inspection of the scene before the final render"
31 LESSON
"Automation of the rendering process"
"Final inspection of the scene before the final render"
31 LESSON
"Automation of the rendering process"
You will bring the render to the ideal, learn how to speed up the render and make it cleaner, how to properly organize the automatic rendering process.
Materials for the lesson: a memo on post-correction in Photosho
Duration of lessons: 27 minute
Materials for the lesson: a memo on post-correction in Photosho
Duration of lessons: 27 minute
RESULT
MODULE 10
"SPECTACULAR RENDERING. THEORY"
"SPECTACULAR RENDERING. THEORY"

More detailed
available for 2 tariff
LESSON 32
"Methods of spectacular presentation of renderers"
LESSON 33
«Light Mix. Theory"
"Methods of spectacular presentation of renderers"
LESSON 33
«Light Mix. Theory"
You will learn the ways of spectacular rendering, the principle of operation of Light Mix.
Duration of lessons: 20 minutes
Duration of lessons: 20 minutes
RESULT
MODULE 11
"SPECTACULAR RENDERING. PRACTICE"
"SPECTACULAR RENDERING. PRACTICE"

More detailed
available for 2 tariff
34 LESSON
"Mood: sunset"
35 LESSON
"Mood: rain + drops on the glass in the shower"
36 LESSON
"Mood: evening"
37 LESSON
"Gradual appearance of furniture in the room"
38 LESSON
"Turning on/off the light"
39 LESSON
"Lowered blinds"
"Mood: sunset"
35 LESSON
"Mood: rain + drops on the glass in the shower"
36 LESSON
"Mood: evening"
37 LESSON
"Gradual appearance of furniture in the room"
38 LESSON
"Turning on/off the light"
39 LESSON
"Lowered blinds"
Create atmospheric shots with different feed options (sunset, rain, evening, gradual appearance of furniture, Light Mix, closed blinds, water drops in the shower)
Duration of lessons: 53 minutes
Duration of lessons: 53 minutes
RESULT
#how_it_goes
HOW IS THE TRAINING
COURSE GOING

you get access to the training platform

you watch video tutorials at a time convenient for you and perform practical tasks

use the faq if you have difficulties

after completing all the tasks, you receive a certificate of completion of the cours

after graduation, you have the opportunity to review video lessons at any time, but for this you need to save them to your PC
#tariffs
Tariffs
Tariff 1
349$
/9 modules: 31 video lessons
/Access to lessons for 6 months
/"Smart FAQ" of 39 problems
/19 original pro models
/Project in the portfolio (design concept from the course)
Мест уже нет
/Certificate of completion of the course
Tariff 2
399$
/11 modules: 39 video lessons
/Access to lessons for 9 months
/"Smart FAQ" of 39 problems
/19 original pro models
/Project in the portfolio (design concept from the course)
/Certificate of completion of the course
+ Bonus materials
/Posting graduates' work on Anna's Instagram
/Course guide (detailed lesson timecode)
+ Bonus materials
/Posting graduates' work on Anna's Instagram
/Course guide (detailed lesson timecode)
600$
650$
ARE YOU HAVING DIFFICULTIES WITH PAYMENT OR DO YOU HAVE ANOTHER QUESTION?
#reviews
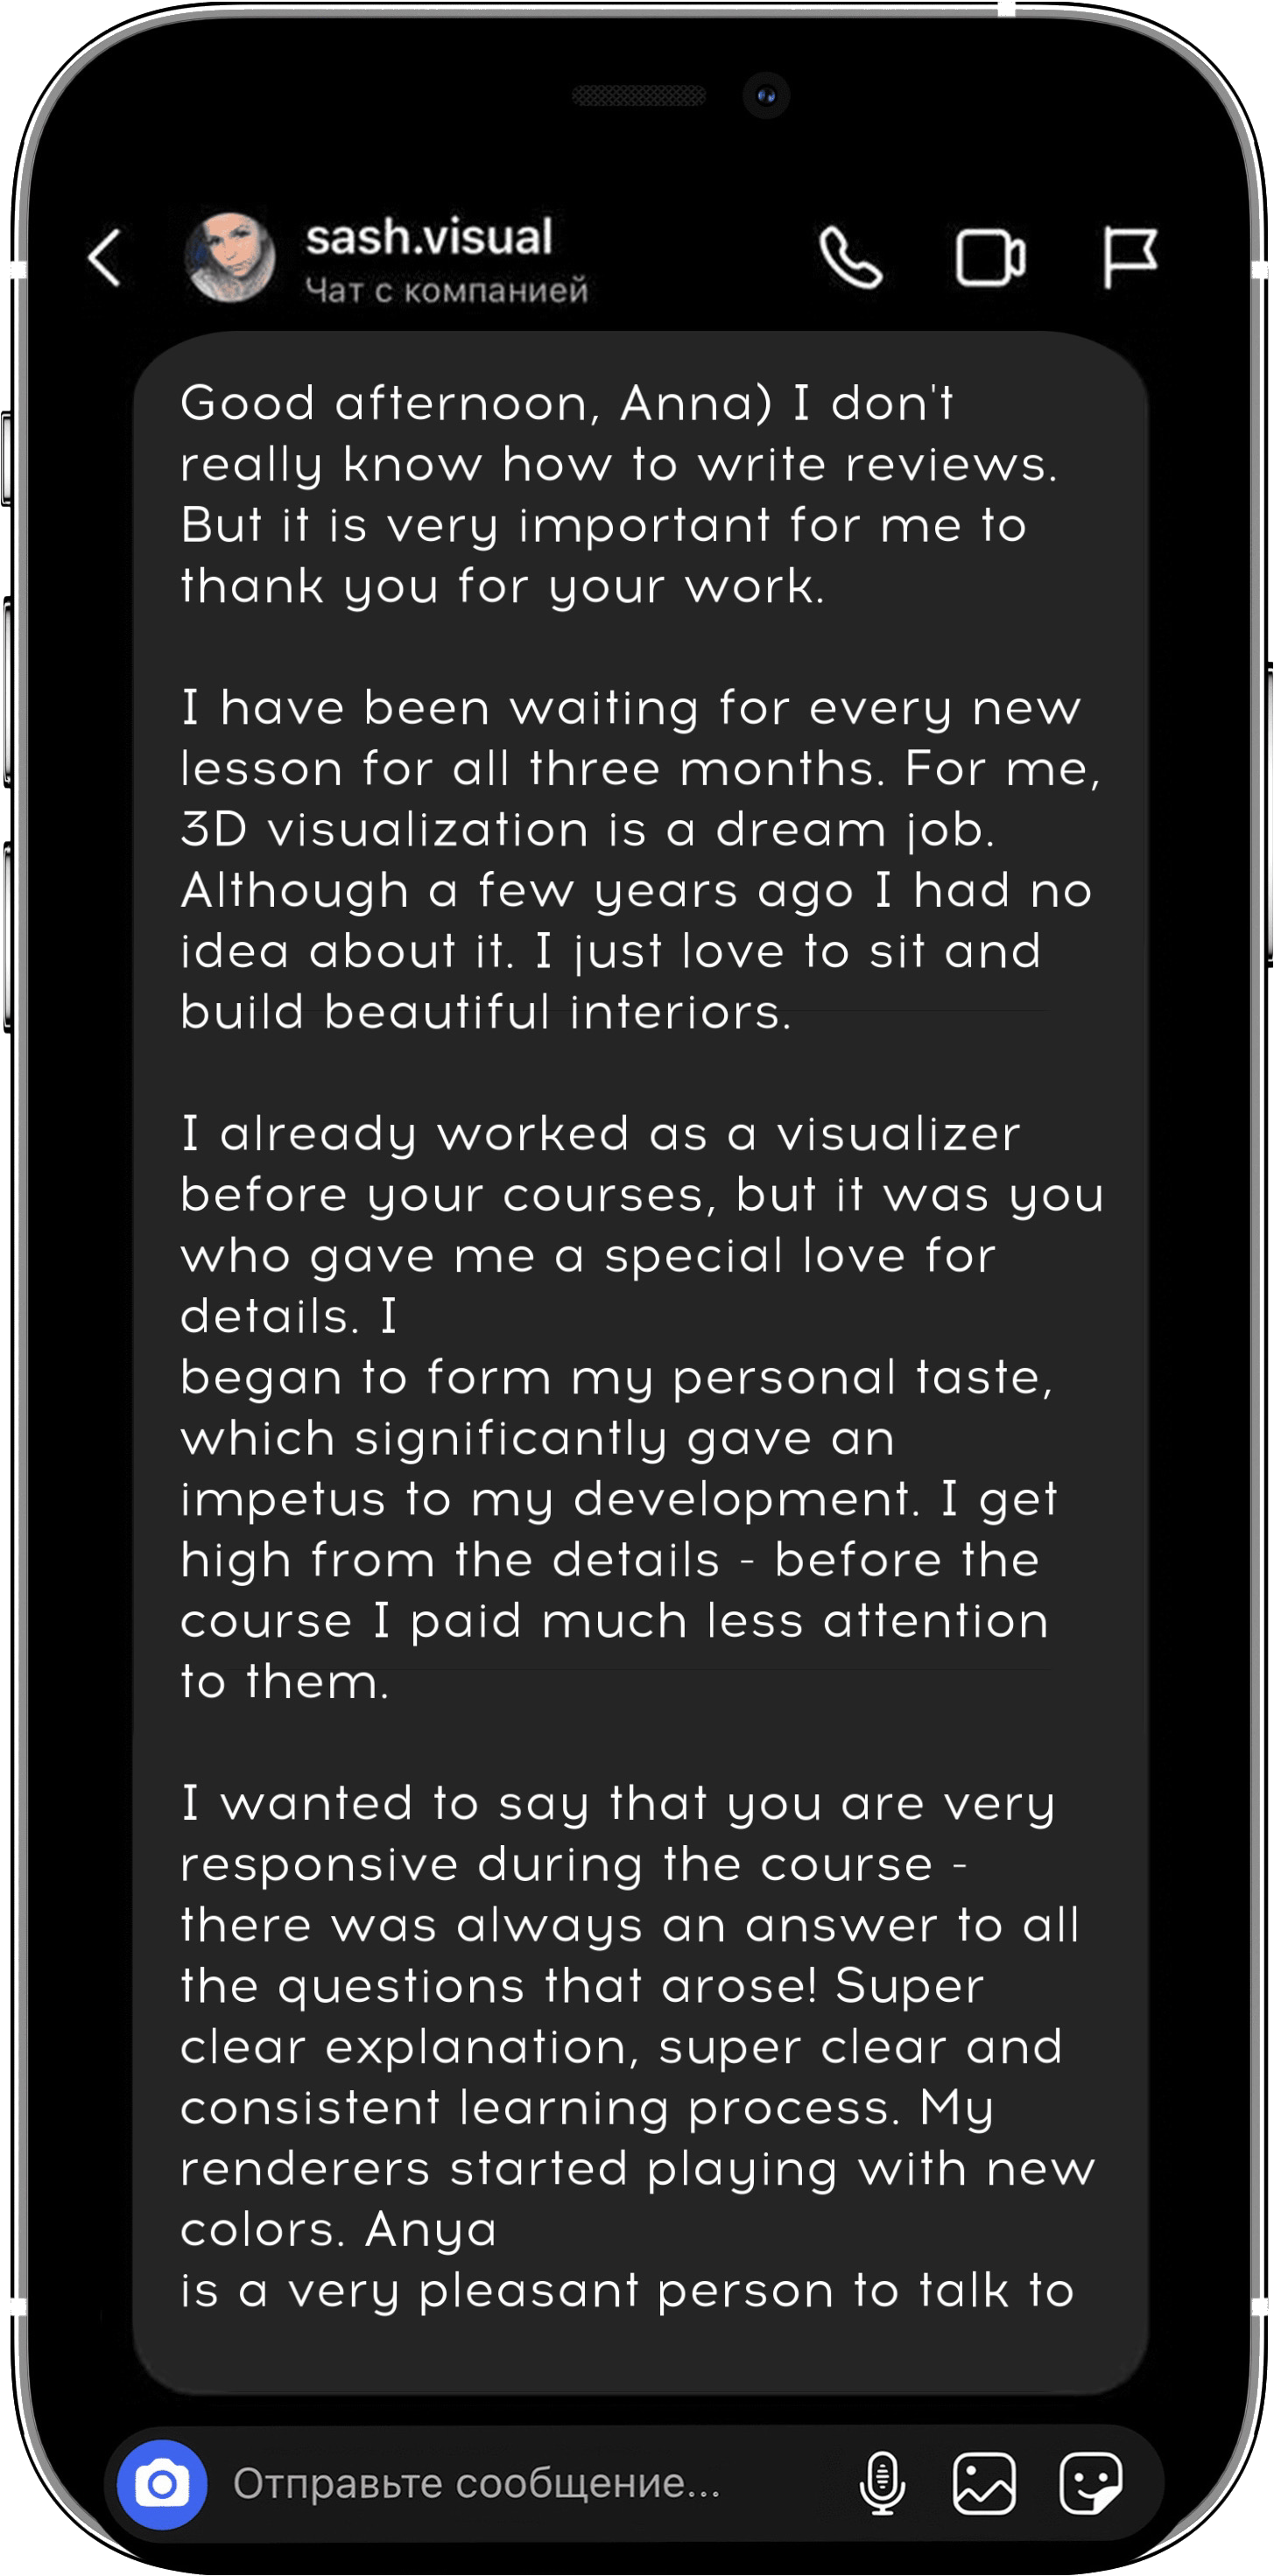
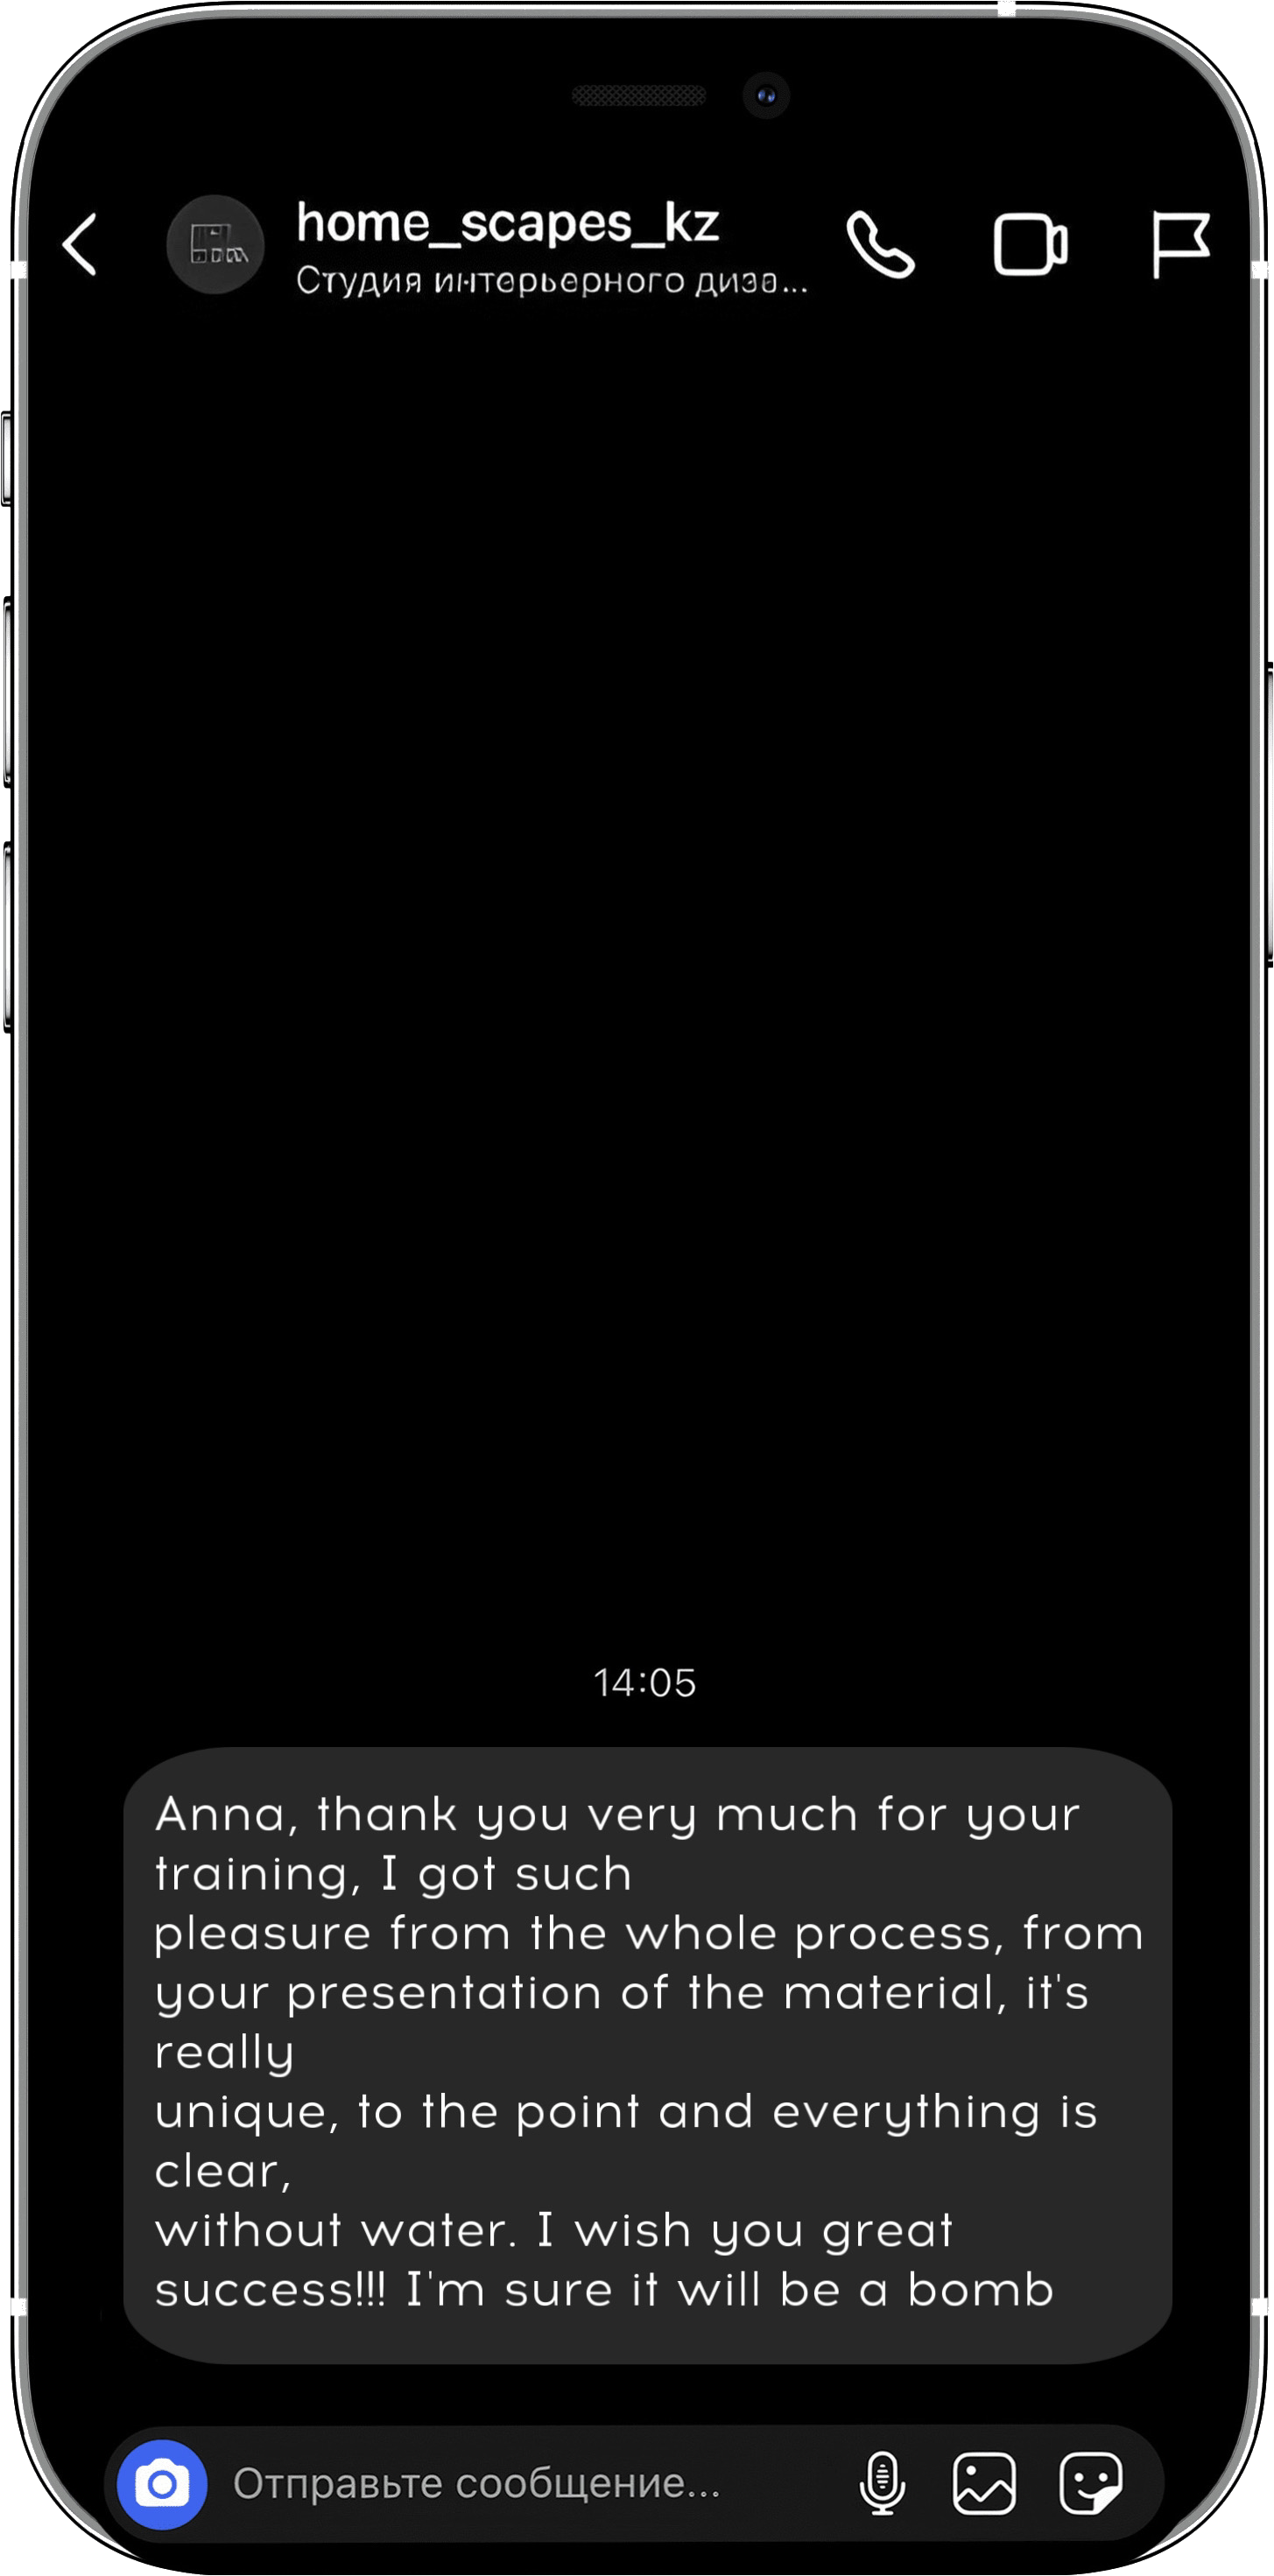
REVIEWS AND RESULTS
OF MY STUDENTS
#author
ANNA KIREEVA, CREATOR OF THE 3D VISUALIZATION STUDIO "CLEAN LINES"
COURSE AUTHOR

more than 1000 publications in international online media

creator of the SMART RENDER course, for visualizers from all over the world in English and Russia

62K subscribers in a professional blog

more than 300 graduates of the interior visualization course

the cost of interior 3D visualization from $ 22/m2

the path from beginner to pro in 2 years
#faq
FREQUENTLY ASKED
QUESTIONS
You can pay for the course now and start a little later if there is no time right now. The course is designed specifically for working people. We understand what a small amount of time a busy person can devote to on-the-job and family training
The course will be held on the Get Course platform.
In order to avoid draining the training material, it will be protected by the infoprotector program. To access the preview, you will need to get your personal activation key. It will come to your email.
important! The key can be used on only 2 devices (for example, on your PC and laptop)
In order to avoid draining the training material, it will be protected by the infoprotector program. To access the preview, you will need to get your personal activation key. It will come to your email.
important! The key can be used on only 2 devices (for example, on your PC and laptop)
3/HOW LONG WILL THE TRAINING TAKE
3-4 months with regular course completion
3-4 months with regular course completion
Access to the course on the platform is provided for 6 months. During this time, you will definitely have time to pass it. Also during the course you will be able to save the lessons to your PC and review them after the end of the course.
As our practice has shown, this is enough to fully master the skills
As our practice has shown, this is enough to fully master the skills
Write to technical support, we will find another payment method and deal with all questions, problems and difficulties.
If you have never worked in 3d max, then training will not suit you
Yes, if you have already worked in the program and understand the essence, but your renderers lack photorealism, presentation, showiness, and the assembly process itself lacks structuring and speed.
Interiors will be created in 3ds max + Corona Render programs.
Easy post-correction of renderings will be carried out in Adobe Photoshop CC
IMPORTANT: 3ds max can only be installed on Windows operating system!
Easy post-correction of renderings will be carried out in Adobe Photoshop CC
IMPORTANT: 3ds max can only be installed on Windows operating system!
You can see the minimum PC specifications recommended by AUTODESK it self. From myself I will add: the more powerful the characteristics of your PC, the better. I'll attach mine below: Processor: AMD Ryzen x16 R9-3950X Underfloor cooling: BE QUIET! DARK ROCK PRO 4 Motherboard: MB SAM4 MSI MPG X570 GAMING PLUS RAM: RAM_DDR4 KINGSTON 2×16GB DDR4-3333MHz XMP HyperX Predator Video card: SVGA MSI GTX 1660 GAMING X 6G
Designers who are looking for a cool and skillful visualizer will not care if you have made a render of your design or a design from my course. It is important for them to see the presentation and quality of your work.
Why everyone makes the same design: I tell you the nuances that will help make the render juicy and tasty, and show it by a concrete example. There is a concrete example and specific tools for it. And also this design gives showiness to the render.
If you immediately apply knowledge on another project, it may have a bad effect on their digestibility, and also this project will have a different design, and it may not cause a potential customer to resonate, and then the result will be worse.
You need to do all this together with me, understand and feel it on a concrete example. Get the result and start using it as a portfolio.
And after that you can come up with your own concept and re-apply all this knowledge on it, already based on its specific features
To complete the course, you will not need to purchase PRO models.
Access to training materials is unlimited from two activated devices. Since you download all the video tutorials to your PC. Internet access is required to view the lessons
#contact_us
Telegram
kireeva@des-cg.ru
E-mail
@kireevaaanna
Inst
Vk


